Thursday 29 January 2015

Editing Techniques

I have been researching the various different editing techniques to help me when piecing together my different shots. I realise that there are a lot of different techniques i can use due to the three scene sequence, so i will use this to its full potential. Here are some editing techniques I have researched:


Graphic Match


This is a cut between two objects or situations that are a similar in action to each other, suggesting a link or strong connection between the two.
When filming this was the main editing technique i had in mind. I will use this when changing from scenes by in order to link the separate scenarios together such as the radio music to the phone, and the smashing glass to the murder scene.


Action Match

This is when two shots are used to show the same action, creating a fluid cut.
I will be using this throughout my title sequence in order to have high continuity.


Motivated Cut

This is when a cut from one shot to another is motivated by events or dialogue in the first shot.
This is not something I will be using in my title sequence because I have focuses only on action and not dialogue to create the awe of mystery around the murderer.


Jump Cut

This is when two sequential shots of the same subject are taken using shots that vary very little. It gives the effect of skipping through a short period of time.
I didn't intend to use this in the first place however after looking through my footage, some of the shots are quite long, such as the burning photographs so I will cut them once or twice to shorted the action. 


Cross Cut 
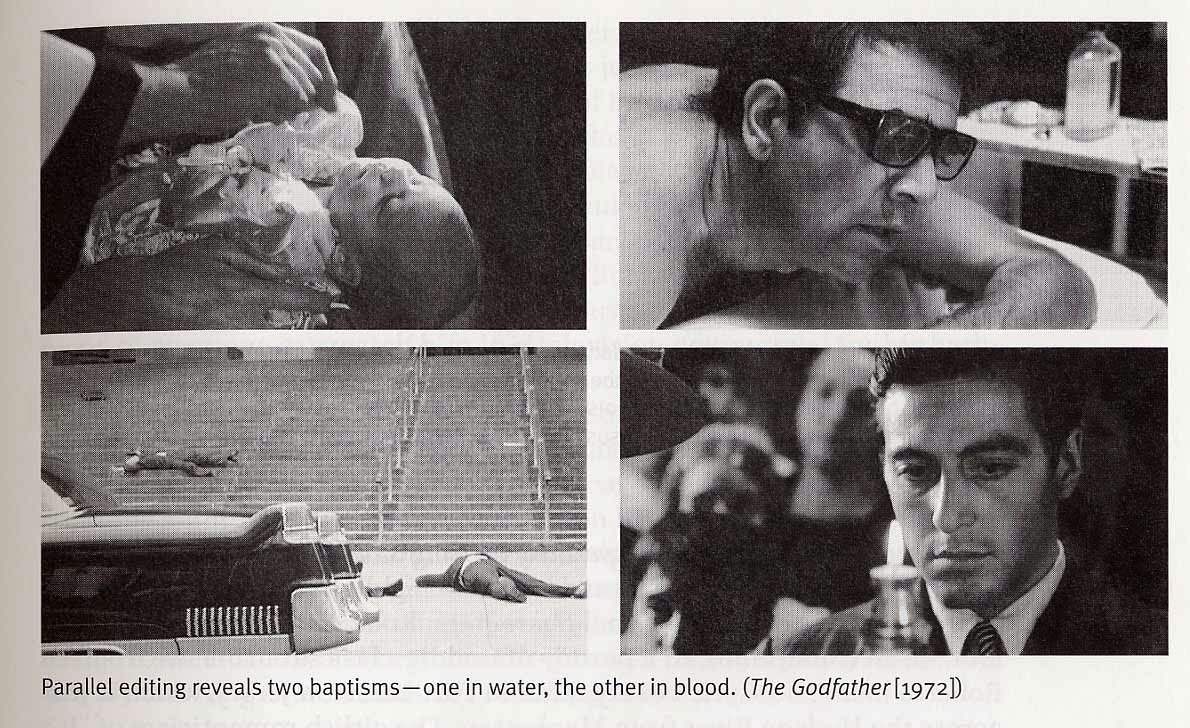


This is when an event is happening in two different shots that are obviously happening at the same time. This is used to show a link between the two embedded narratives.
This isn't really relevant for my opening sequence as I am focusing of flash-backs in order to link scenes which have already happened.


Superimpose

This is when another shot is layered over the top of the original shot. Commonly used to suggest previous events linking to the main shot or even thoughts of the character.
I might use this shot to blend the murder scene with shots of the murderer.

Sunday 25 January 2015

Second Scene Filmed

I have completed filming all of the footage for my second scene and uploaded it onto my editing software with the other clips from the first scene. I have looked over each shot and most are good, but there are a few which have other objects in the scene (such as my sink) which take away the effect. Luckily I have enough well shot clips that will make up for the other less useful ones. Therefore I won't need to do any extra filming for scene two. This is the clips in the editing software:


Wednesday 21 January 2015

First scene filmed

So last night I finished filming the footage for my first scene of David shaving and the blood in the sink. I have uploaded this up onto my editing software and have had a look over each shot. All of my shots are clear and I have cut out certain shots that were distorted. Overall the scene filming was successful and I won't need to do any retakes. Next step is to start filming the burning photographs which I will do in the next couple of days.


Monday 19 January 2015

Filming the first scene

Okay, so last night I filmed the first scene of my opening title sequence in which I am going to intertwine with the two other scenes I will be filming this week. I ensured I captured a range of different shots, diverging from my story board so I have more than one option when it comes to editing. Despite the filming space being minimal, I was able to get clear, professional angles/shots which will be effective when it comes down to editing. I will be filming the next scene tonight, so I will upload feedback on this tomorrow. Thanks

Thursday 15 January 2015

Project so far ...

After completing all the planning needed to gain a wide understanding of what would be the most effective to include in my opening sequence, I am beginning to film. The first scene I will shoot will be the close-ups of the protagonist (David) as he gets ready on a morning. This will include blood droplets from shaving as they spread through the water, giving the sinister feel. I am planning on completing the footage for this tonight and then over the weekend I will shoot the Forrest scene. I feel I am well on track with shooting and have time to ensure my footage is effective, by experimenting with lighting and setting. I will next update you after I have shot the first scene to give feedback and evaluate.


Thursday 8 January 2015

Animatics of Movie Titles

Here I have created a short video of the titles I am going to use in my opening sequence, experimenting with font and animated titles. I have decided to use something similar to the drip animation, as it gives the impression that the titles are being formed from blood. This will give my opening sequence the dark, thriller atmosphere I am hoping to achieve. I have also added my soundtrack which I am planning on using, to add more depth and to demonstrate how the music in my opening sequence is going to sound. Here is the clip:


Tuesday 6 January 2015

Mood Board

I have created a mood board on pinterest with some images relating to my ideas for my opening sequence. Click here to acess: http://uk.pinterest.com/ameliapickering/as-media-mood-board/

Sunday 4 January 2015

Location Scouting


As I have said in previous posts, I want to try and create a dark, mysterious atmosphere for my audience in my opening sequence. I am going to use three different locations to do this, a bedroom, a bathroom and a forrest. These are photographs of these three places:

Forest


House


Friday 2 January 2015

Props List

So when i'm filming my title sequence, I am going to need a variety of props that I will make sure I have, so it does not interrupt my filming. Here is my prop list:
  • Alarm clock 
  • Mobile phone 
  • shaver 
  • black bag
  • Old photographs
  • Knife covered in blood
  • Towel
  • Handkerchief
  • Metal trash can
  • Mug

Shots and Movement List

So it's almost time to start filming so I'm going to have to rap up all of my planning in the next week or so. I want to make sure that when I film I am meeting all of the assessment criteria, so I don't have to go back to get extra footage when I am editing. I have made a shot list, showing which camera shots and movements I am including, to make sure i use a variety to make my film diverse. Here is my shot list:

Movement
  • Slow Pan - I will use several slow pans to establish setting such as the shot of the river. 
  • Upwards Tilt - this movement will cause suspense as i will use it to follow the sound of the ringing phone.
  • Zoom - the audience focuses on certain miss en scene, in this case the burning pictures.
  • Reverse zoom - this will gradually show more of the scene, creating suspense and tension needed for my opening sequence.
  • Tracking - used to track the man pulling the body through the woods.
  • Overhead pan - gives a clearer view of the setting, setting mood and atmosphere.
Shots

Medium shots - used again to focus on a character or certain props such as the alarm clock. example:


Long - these will establish setting such as the river in the forest. example:


Medium Close-up - conceals identity of the killer from the audience, creating a mysterious atmosphere.


Extreme Close-up - intense, portraying the thriller genre, used on shots such as the eyes.


High angle - to belittle characters or show them in danger. I will use this on the shot of the dead body.


Low angle - this highlights power, which will be used on shots of the killer.


Wide - again to set the scene.